Friday, October 25, 2013

Recipe - Microwave Peanut Butter Cake

I surely am enjoying the time off that I have but I also admit to being slightly stir crazy due to all of it. But when one gets this way, one cooks and starts to make plans to cook! I think my mother and I spent more then an hour yesterday on the phone deciding what and how to make dinners for both my up coming birthday as well as 2 days of cooking come Christmas time. We;re gonna do Christmas dinner 100% from scratch so this will be an interesting adventure. We're booting the 'boys' out (our husbands) for Christmas eve (my DH has to work anyhow) and going to go about making everything from our own condensed mushroom soup to fried onions (can you see where that is going??) to making home-made cornbread sage sausage stuffing to put into a big ol' turkey that we're gonna bake all Christmas day. Man oh man I can't wait! It's been so long since I had any family time much less doing something I loved to do when I was younger, cook with my mother.

I have realized with the time not working now, just exactly how much of my life I put on hold while I was working. I have a new pasta machine that is now 2yrs old, I have a French Macaroon kit that is over a year old and a number of molds/kits that have sat here since I had been working, opened but unused! On top of that, I haven't had a decent time at holiday time, or any other time to be honest, with my own family. The 2yrs that I did work over the holidays, I put everything aside to make sure my bosses had time with their family (they also have kids) instead. I just didn't do anything but work. I realize that so much now that it's almost enough to make me cry.

Sooooo today, it's again getting windy and cold and a perfect time to go about putting in a nice huge pot of American style beef stew! It's not a dish you can just throw together in an hour though! It needs a long slow stew in the oven (or a crock pot I would think) for at least 6hrs or longer if you have time for it. That is for another post though.

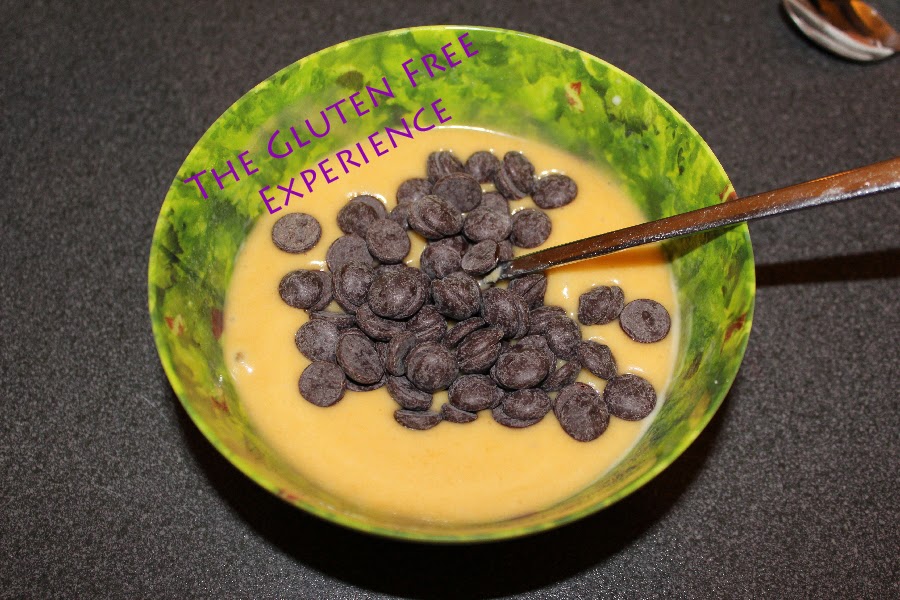
Sweet... must have something sweet and one of my biggest weaknesses, it always has been, is peanut butter + chocolate in any form. A while ago I started experimenting with the 'microwave cake' recipes that were running a muck on the web. I came up with my own peanut butter butter microwave cake with chocolate chips and it even includes an equally easy icing to go with. I've added this recipe to the 'first attempts' section because although it was good, the way I did it with my photos is the way the note mentions and not step by step. Next time, I will get photos while doing it properly step by step and show the difference.

Ingredients
 ♥ 2 Tbs GF flour
 ♥ 2 Tbs peanut butter (creamy or chunky, your choice)
 ♥ 1/2 tsp baking powder
 ♥ 1 Tbs brown sugar
 ♥ 1 Tbs dark/semi sweet chocolate chips
 ♥ 1 egg, lightly beaten
 ♥ 1 tsp milk
 ♥ 1 Tbs powdered sugar


Directions
In a small mixing bowl lightly mix the flour, baking powder, brown sugar together with a fork. Add chocolate chips and give a toss too coat them (it will help keep them mixed throughout instead of sinking to the bottom or floating to the top of the batter before it bakes enough to hold them).


Add peanut butter and egg and mix well. Pour mixture into greased ramekins or other suitable glass/ceramic container suitable for this amount of mixture plus a bit of rising room.


Microwave in 30 second bursts on high power. The same applies here as if you bake it, insert tooth pick in the middle and if it comes out clean it's baked.

While cake is microwaving, in a small bowl mix together the powdered sugar and milk. Add more powdered sugar if you want a thicker icing.


Remove cake from ramekin if you wish to and pour over the icing and eat! Enjoy!


Note ~ You can choose to mix everything together at once, except the milk and powdered sugar but if you want it to come out evenly with the chocolate chips throughout, follow the directions. My photos this time show what happens if you don't take the steps above, all the chocolate falls to the bottom.

Wednesday, October 16, 2013

Time To Cook!

Aaaaaa.... it's been delightful having time to DO stuff again! I actually feel at home again, gotten most of the house cleaning caught up and my kitchen mostly back into order (is that even possible?!). I even made another big bowl of Hot Chocolate Mix which sadly between me using it, giving some of it to friends and a larger portion to my mother, is gone as of last night! But, I have every thing sitting on the counter as I write to prepare another dose!

I was planning to do this yesterday but by the time I went off on a cleaning spree, went grocery shopping and finding it late enough to pick up DH from work, it just was too much work and way too short of time to have it cook properly. So tonight, I have a wonderful purely American style dinner planned.

BBQ Chicken Pieces
 ~ I bought leg/thigh pieces originally but also bought a big package of legs to do up too just because I am really in the mood for BBQ chicken when I went shopping last night
Boiled New Potatoes
 ~ no recipe for this, unless I decide to make some sort of crushed potatoes
Corn-on-the-Cob
 ~ yes I will be posting about this later
Corn Bread
 ~ I've made this many times before with a prefect result but seems I have yet to post about it, will do soon
Stuffed Mushrooms with an Italian twist
 ~ You're just gonna have to wait but it'll be worth the wait as they are so simple and take just a few moments to make
Tapioca Pudding
 ~ Already have this posted so enjoy!

I've been just itching to get into my kitchen to cook something, not just bake something. This is a perfect afternoon/evening. It's gotten down right crappy outside this last week (almost 2 now) weather wise, it's dropped quite a great deal in temp, it's been raining most of the time and if it's not raining it's extremely over cast so even the apartment has gotten to be quite on the cool side without putting the heaters on yet because there is simply no sun coming in to help warm it naturally. My god, I might have to turn on the heat soon *blah*.

Yes yes, the oven shall be put on very shortly here to start making chicken for tonight, I shall start to prepare mushrooms (something that can be done ahead of time and placed in the fridge until ready to be broiled), make the coco mix, prepare the chicken to go in the oven, prep the corn and get it into a pan of water... mmm yes and I'll have the camera within hands reach for it. I know the light isn't the best and I have no windows either in my kitchen but I have to work with what I have.

Remember my blog is dedicated to TRIED & TRUE recipes! I have made these, eaten these, served them. The photos are all made by me as well as proof of this. I also include foods I have tried that are gluten free but those are far and few between because I prefer to make my own from scratch recipes.

Tuesday, October 8, 2013

Recipe - Inside-Out Cheese Burgers

A quick over view of my life lately... the place I was working for has gone under. It was so far in debt that they had not choice to file for bankruptcy and well anyone working there is pretty much out of luck.

Now with that said, I also have SOOOOO much time and I'm LOVING it! No more wondering when I will go in next, if my day off will be a day off, not having 100 things to do on the days I did get off and no worries of time. Although I will miss my job dearly, I also feel almost liberated!

Now back to my KITCHEN! Toward the end of the warmer days this summer, I did have a few moments that I caught something on TV that mmmmm just looked yummy! I was watching the Food Network (yea again, it's my go to when there is nothing else on or I can't give total attention to it) and they were having this kind of cook off against 2 different restaurants that were making burgers that were named 'Juicy Lucys', not sure if that name is spelled right or not). Basically it was 2 slightly thinner hamburger patties with cheese stuffed between, the patties put back together so the cheese created a pocket inside! OMG I was in heaven. My DH on the other hand was thinking 'heart attack waiting to happen' until I pointed out to him what exactly was the difference on having a piece or 2 of cheese ON the burger or melted between the patties! He was still kind of off the idea, until I got into my kitchen a couple days later that is.


So here we go... my version of them. I decided to name them Inside-Out Cheese Burgers. This is such an easy recipe it's not funny and I can think of at least a dozen different cheeses that would work well but so far the best I have found to work is the every day American style Cheddar slices. You know the kind, wrapped piece by piece in clear plastic and sold in something like 10slice packs, although I'm sure now a days there are bigger packages too.

Ingredients (recipe is for 2 patties)
 ♥ 2 1/3 to 1/2 pound ground beef (I use lean sirloin)
 ♥ 2 - 4 slices american style cheddar slices, folded into 4's
 ♥ olive oil or liquid/spray butter/margarine for frying

 
This can even be a kid friendly/involved recipe as long as there is an adult to supervise when it comes to using the stove.

Directions
Step 1 - make even amounts of patties... make them rather thin and about the size of your hand (including your fingers), you will need excess on the sides like you would a pie crust in order to compress the patties back together and seal the seams. Make sure the patty is 1 piece with no holes or really thin spots. You want them as even as you can get them with exception of the sides.


Step 2 - lay out your patties side by side and place 1 or 2 folded slices of cheese right in the middle a patty while leaving a 2nd to cover over that cheese to reform into 1 patty.


Step 3 - put the other patty carefully over the top of the patty with cheese and start to work the sides back into each other to seal them and create one larger patty. This is the reason you want them rather thin or you won't be able to cook them through properly.


Step 4 - Fry... make them any way you would normally make your hamburgers. No doubt there will be a tiny place here and there that didn't seal right and cheese will bubble out, don't worry about it, just scoop it back up when you pick up the burger! Or perhaps you'll have spent enough time fold in the sides and won't have it happen at all, if you do SHARE with us how! I have made these at least 15 times now and almost every time there is at least 1 burger that oozes before it's finished.


The photos I made show me making one patty with the american cheese slices and the other with slices of mozzarella. They were both good but if you really want the ooze factor from the mozzarella then you must eat it first thing and piping hot or it just gets cold and goes back into a more solid form. It will of course never be almost liquid as the american slices end up being but it was still good! I'm sure a number of other kinds of cheese, American or other countries alike, just look for ooze or stretch (like the mozzarella cheese) factor!