Lets talk sinful for a while... sinful as in probably the most calorie and fat rich desserts out there today... Tiramisu (at least in this way). Why you might think do I classify this as one of the most sinful? Simple, 2 pounds of cheese made mostly of cream instead of milk (mascarpone), 6 egg yolks, lady finger/sponge cookies and to top it off because this is a cooked version of the recipe add 2 cups of whipping cream to it! How much more sinful and unhealthy can you get?! But we should all indulge once in and a while right?? RIGHT????
The reason this recipe is 'cooked' is 2 things have been altered. First you make another Italian dessert called Zabaione instead of just mixing cheese and raw egg yolks and 2nd where as traditionally the recipe for this calls for you to use egg whites whipped. This one uses cream. I rather have a cooked and higher fat/calorie dessert then eat raw eggs. My husband is always telling me that I worry too much but be my luck the first time I stop worrying about things like raw egg eating will be the first time I get really sick from it... or worse, make someone else sick so thank you, I'll stick to being on the over cautious side!
I ended up making this not because I really wanted to make it like most of recipes but purely by chance. I went shopping blindly, as in I thought about recipes I might want to make sometime soon and thus bought ingredients I thought might be in it. In this case I meant to make a recipe for Sicilian cheesecake which also calls for an Italian cheese but ricotta not mascarpone and on top of it I remembered it called for quite an amount... some where in the range of 2 or even 3 cups. In my house ricotta never is a miss any how because it goes so well in so many things. It's basically an Italian version of cream cheese. However, my mistake, I didn't know at the time which cheese was needed but for some reason I thought it was mascarpone and thus bought *2* 1 pound containers of the stuff. My god, what am I gonna do with all of that and I HATE wasting food. Then came this recipe!
The recipe I made here makes a massive amount, as in a 13x9inch baking pan that is 2inches deep and even then it came right smack to the top of the pan. Any more and it wouldn't have fit at all. So if you rather make a smaller portion, just half the recipe... there are enough of all the ingredients to do this simply.
I do have a couple of tips to make this go better for you
Tip #1 - Have all of your ingredients and equipment ready. This recipe is not something to just leave and forget about even for a few moments as you will end up with either cooked eggs or cream that doesn't whip or any other number of problems.
Tip #2 - Use a metal bowl for whipping your cream. Place metal bowl, beaters for your mixer and the cream in the fridge to chill out while you prepare the other ingredients. You want every everything that will involve whipping your cream as cold as you can get it without actually freezing it. I even went as far as placing my carton of cream in the freezer for about 30mins prior to the whipping process. Remember the cream though! Don't let it even get close to freezing as this will harm the whipping process... cream does not freeze well at all.
Tip #4 - Use Mascapone cheese and do not use something like cream cheese or ricotta. They are not made from the whole cream that mascapone is and on top of it have a completely different flavor and texture. It will not make the recipe come out the way it should. And lets face it, there is already 2 cups of cream in this recipe, you won't be doing yourself any favors by trying to use something lower in fat anyhow.
Tip #4 - Make sure if you aren't using an actual double boiler but a pan with a pot or bowl above it, that you use a bowl or what have you that is big enough to sit in the pot so that it doesn't hit the water below (this will scramble your eggs and you don't want this) but it also sits firmly enough in the pot that it doesn't let the heat out the sides. You need a low simmer of water going all the time and if steam is being let out the sides it won't keep an even temp.
Tip #5 - Make sure you have enough room in your kitchen to have a few processes going at once as you will have at least your stove with a double boiler going, a bowl to have the cheese in so you can add the zabaglione (the double boiler portion of the recipe) to it, another bowl for whipping your cream, most likely another larger bowl to put both the bowl of cheese/zabaglione mixture and whipped cream together in for the folding process, a bowl with espresso with your lady fingers ready and on top of all that as if it weren't enough... the pan for actually assembling the Tiramisu. So yea... have lots of room ready when you start to make this recipe.
Tip #6 - HAVE PATIENCE! Above all these, have patience. There are quite a few steps in here that require you to be calm and collective. When you think it is going wrong or 'why isn't it done yet?!', just a bit longer and it'll all come together... this is the KEY tip to making this dessert.
With the tips out of the way... lets move on forward with the recipe. I LOVED this dessert and I kicked it up a notch by adding fresh jumbo raspberries in the top layer after I did the dusting process. I do give a warning with this recipe though... if you have had your gallbladder out, eat this with reserve! A VERY small piece goes a long ways, the pieces I show in my photos out did me and actually brought back some painful memories of when I first had it out and eat a bit too much fat the first month due to the fat content in it and well although the dessert is so worth at least a small bite here and there, resist the temptation to eat it in the pieces I started to! You'll thank me for this in the end LOL.
Ingredients
Espresso Dip
♥ 1 cup strong espresso (I used decaf)
♥ 1 cup strong espresso (I used decaf)
♥ 1/2 cup coffee liquor (Kalua works well)
♥ 2 tsp granulated sugar
♥ 2 tsp granulated sugar
Zabaglione
♥ 6 egg yolks (this recipe does not use the egg whites at all)
♥ 3/4 cup granulated sugar
♥ 3/4 cup red port (for better but more expensive use Marsala wine instead)
♥ 2 pounds Mascarpone cheese
♥ 2 cups heavy whipping cream
Finishing/Assembling
♥ 40 to 60 lady fingers (make sure you buy a GLUTEN FREE version!!!)
♥ coco Powder (the dutch process kind and not the sugared drink stuff)
♥ raspberries or strawberries (optional)
♥ coco Powder (the dutch process kind and not the sugared drink stuff)
♥ raspberries or strawberries (optional)
Directions
Combine the espresso, kalua and sugar in a bowl suitable for allowing you to dip the lady finger cookies in. Do this mixing while the espresso is still hot so that the sugars will dissolve completely. Set aside for later use and for it to come to room temp. You will need to be able to place your fingers in this so it has to be at least cooled.

Get your double boiler ready (or make-shift one). Again make sure your bowl doesn't touch the water and that you only let the water simmer. A boil will cause the pot above to become unstable, too hot for the this process and end up scrambling your eggs instead of thickening them. In the bowl or pot you'll be using as the top of your double boiler, whisk by hand the egg yolks and sugar until pale in color and slightly fluffy. Whisk (again by hand, only thing you'll need a mixer for is the cream later on) in the port and combine well. Place the bowl on the double boiler, turn your heat on, get it to your simmer and keep your whisk handy. This is one of the processes in which you need to have patience. You'll need to first let the water come to temperature, once it is you'll need to give a good whisking to the mixture every few minutes until you start to feel the mixture thicken. This process can take up to 20 minutes of your time but you will feel that perhaps in the end that its not cooked enough because yes it will have thickened up from it's cold state but it will still be quite thin. This is normal as it will start to thicken even more when it starts to cool and even more when you place the finished dish in the fridge to chill. Remember this process is to cook the eggs and to only slightly thicken the mixture.


In between the whisking of the step above, get a bowl ready with your mascapone cheese. With a rubber spatchula mash/break up the cheese a bit. Once you have the Zabaglione mixture finished and yes while it's still hot, pour it over the cheese. Keep your spatchula near-by and use your whisk to mix up the cheese and Zabaglione until well combined, no more lumps of cheese can be seen and it looks creamy.


Go get your bowl, beaters, mixer and cream. Make sure your bowl is at least 3x's the size of the 2 cups worth of cream that will be in it. Whip all 2 cups worth of cream. This is another part of the recipe that will require your patience. And no you do not need sugar for this process and why you might ask? Simple, with all of the sugar that is already in the Zabaglione as well as the sugars that are in the espresso mixture and cookies! This takes a while but with your mixer on full speed just let it mix the cream up. Again you'll start to wonder if it's gonna happen or not but as you let it run (I'd say give it 5 minutes at least) you'll start to see the mixture thicken and then you want to be even more patient because you want the cream thick. Not butter thick so watch that you don't over beat it but you want it to be able to stand in peaks on it's own when you are done.

This is where I would suggest a bigger bowl unless you were smart enough to already use a bowl 4x's bigger then the cheese mixture! You want to FOLD in the now whipped cream into the cheese mixture, put your whisk in the sink as you don't need it any more and grab that spatchula I told you to keep on hand still. Be gentle about this and slow. You want the mixture to come together completely and again you'll need patience. Do not get into beating it or something... just keep folding and in a bit of time it will all come together perfectly.

With your now completed cheese and cream mixture, your ready to assemble! Put your cookies in a way that you can just grab them (putting them in a bowl or on a plate works but get them out of their packaging as you'll have messy/sticky hands and won't want to have to reach for the package), grab your by now chilled bowl of espresso mixture and a 13x9x2 inch cake pan (for this recipe it MUST be deep! At least 2inches or deeper) and prepare yourself as this is where it was all worth that patience you had throughout!
Your going to start a layering process. Cookie by cookie, dunk each one in the espresso mixture for a few seconds but only VERY briefly as you just want the cookie to absorb a bit of the espresso mixture but not so much so that they are falling apart. You want a bit of a bite still to the cookie in the end and well you have to be able to get it over to the pan! As you finish dipping each cookie, start laying the cookies across the bottom of your pan in a single layer and try to cover the entire pan (I had to break a few cookies in half in order to do this). With the single layer of cookies laid, spread half of your cheese & cream mixture over the top and make sure you get the mixture into all of the small corners. Once the mixture is spread out evenly, take some of your coco powder and lightly dust the entire layer of cheese mixture so that you don't see any of the cream color coming through. The best way to do this is either have a very fine shaker of sorts meant for coco dusting or simply take a very fine mesh strainer (I have a 3-4 TBS sized one that worked perfectly for this), fill it about 3/4th full of coco (about what you'll need for the entire dish in the end) and then gently tap the side of it while over the pan to allow the dusting action to happen.


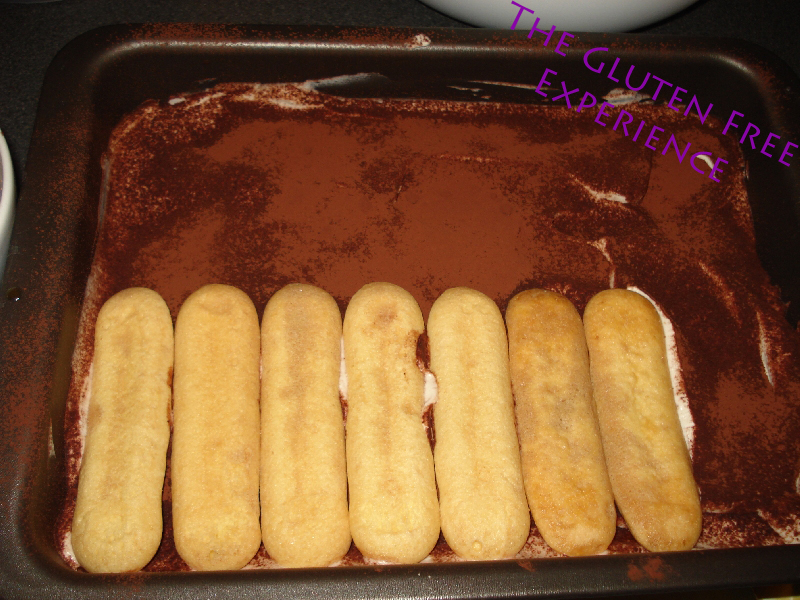
You'll now want to rinse and repeat the 2 steps above. Dipping cookies, layering them in a single layer across the cheese mixture this time and then spread out the last of the cream mixture on the cookies and ending with a firm dusting of coco powder. Don't be shy on the powder! If you are like me and don't really care for the bitterness of coco powder say in something like coco powder covered truffles, this is nothing like it! With all the sugars and cream going on, you want to have this slight bitterness coming through.

In my version, I also took a good portion of raspberries and simply placed them on top of the final dusting of coco powder and presses very gently so that they sink into the cheese. This was mostly for decoration in on my part but in the end it worked really nicely. I would even consider putting it in the first layer of cheese when done if you like raspberries as much as I do or even if your just looking for a slightly different Tiramisu recipe.

With your finished product, place in the fridge for at least 3hrs (if you have a fast cooling fridge like I do this is plenty of time) but as with most recipes that need chilling, I'd suggest leaving it over night. However if your like me, you can just as well take a taste before but remember, you'll ruin your perfect presentation if you do! I had at least enough self control to wait the 3hrs... over night was never going to happen!


No comments:
Post a Comment